
-
Process: Forging a Field Kotanto
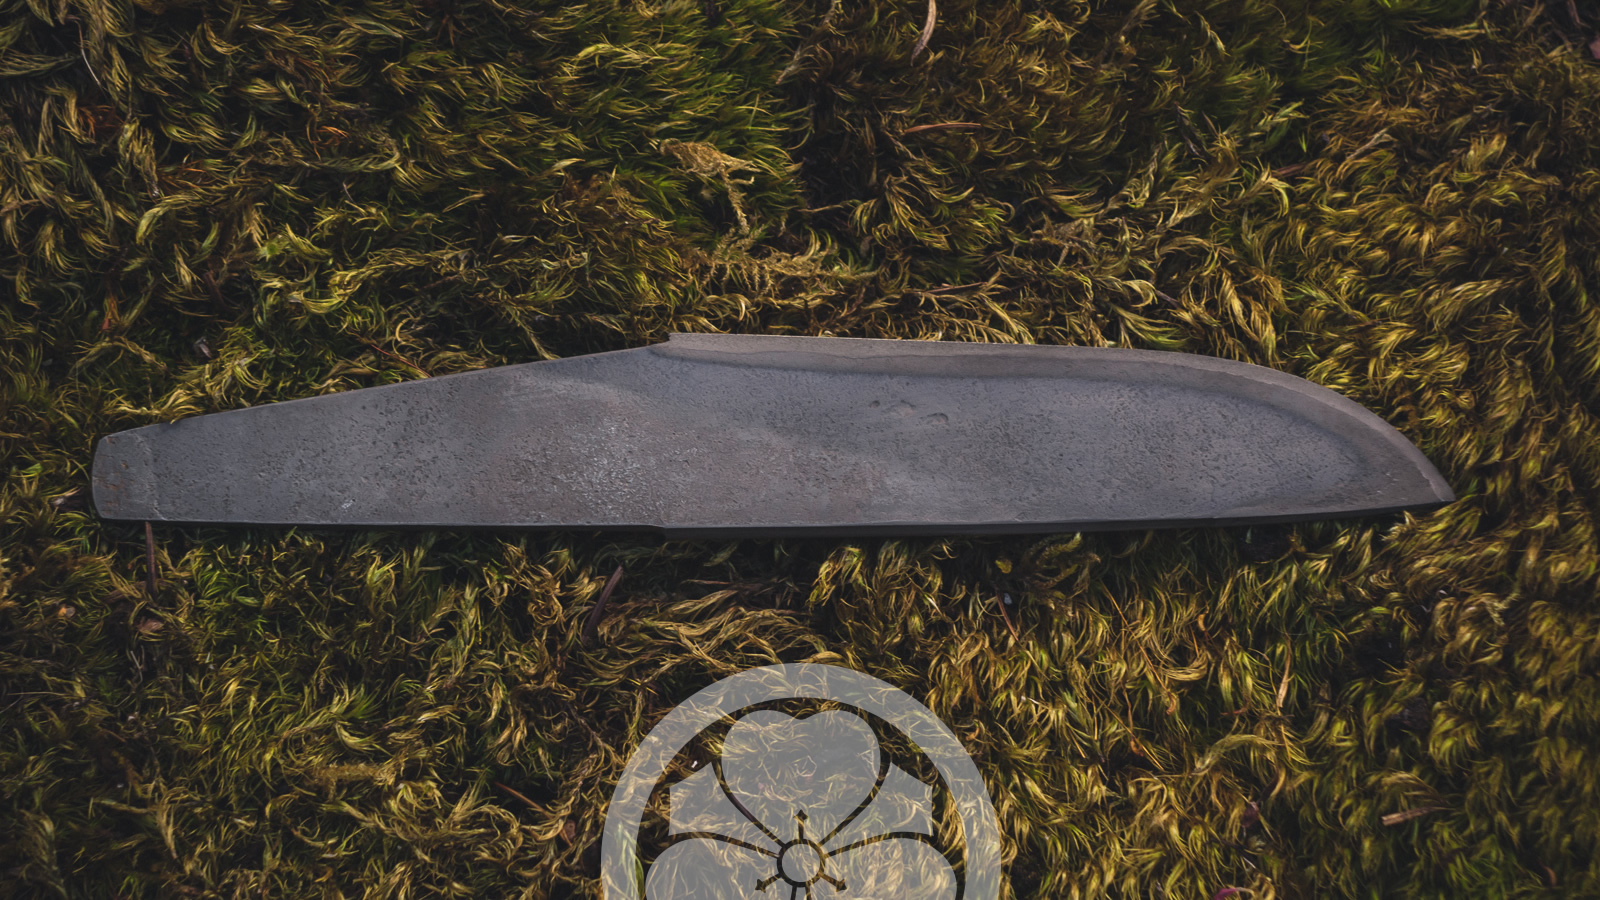
This blade was named Sunagawa (砂川, sand river) because the texture of the blade and the flowing edge of the hamon are reminiscent of the bank of a calm river. It was hand forged in a charcoal swordsmith style forge powered by fuigo box bellows and water quenched with clay, an outdoor knife that has…
-

Thirty Years After The Village Blacksmith
Thirty years ago today marks my first day working under Mr. Emmanuel A. Schrock in a former livery stable in Ohio’s Amish country and embarking into the world of traditional blacksmithing techniques. In the spring of 1992, I traveled to Amish country in Ohio, USA, to learn from Mr. Emmanuel Schrock in the format of…
-

Photo Essay: Final Forging Day
Talented Vancouver Island photographer Jordan Wende stopped in at the Island Forge in mid-July to document the final forging session. In this installment of the series, using the mukozuchi hammer to perform wakashinobe in preparation for forging sunobe. Photographed and edited by Jordan Wende Interior Views Heating a reclaimed steel billet in the charcoal forge.…
-
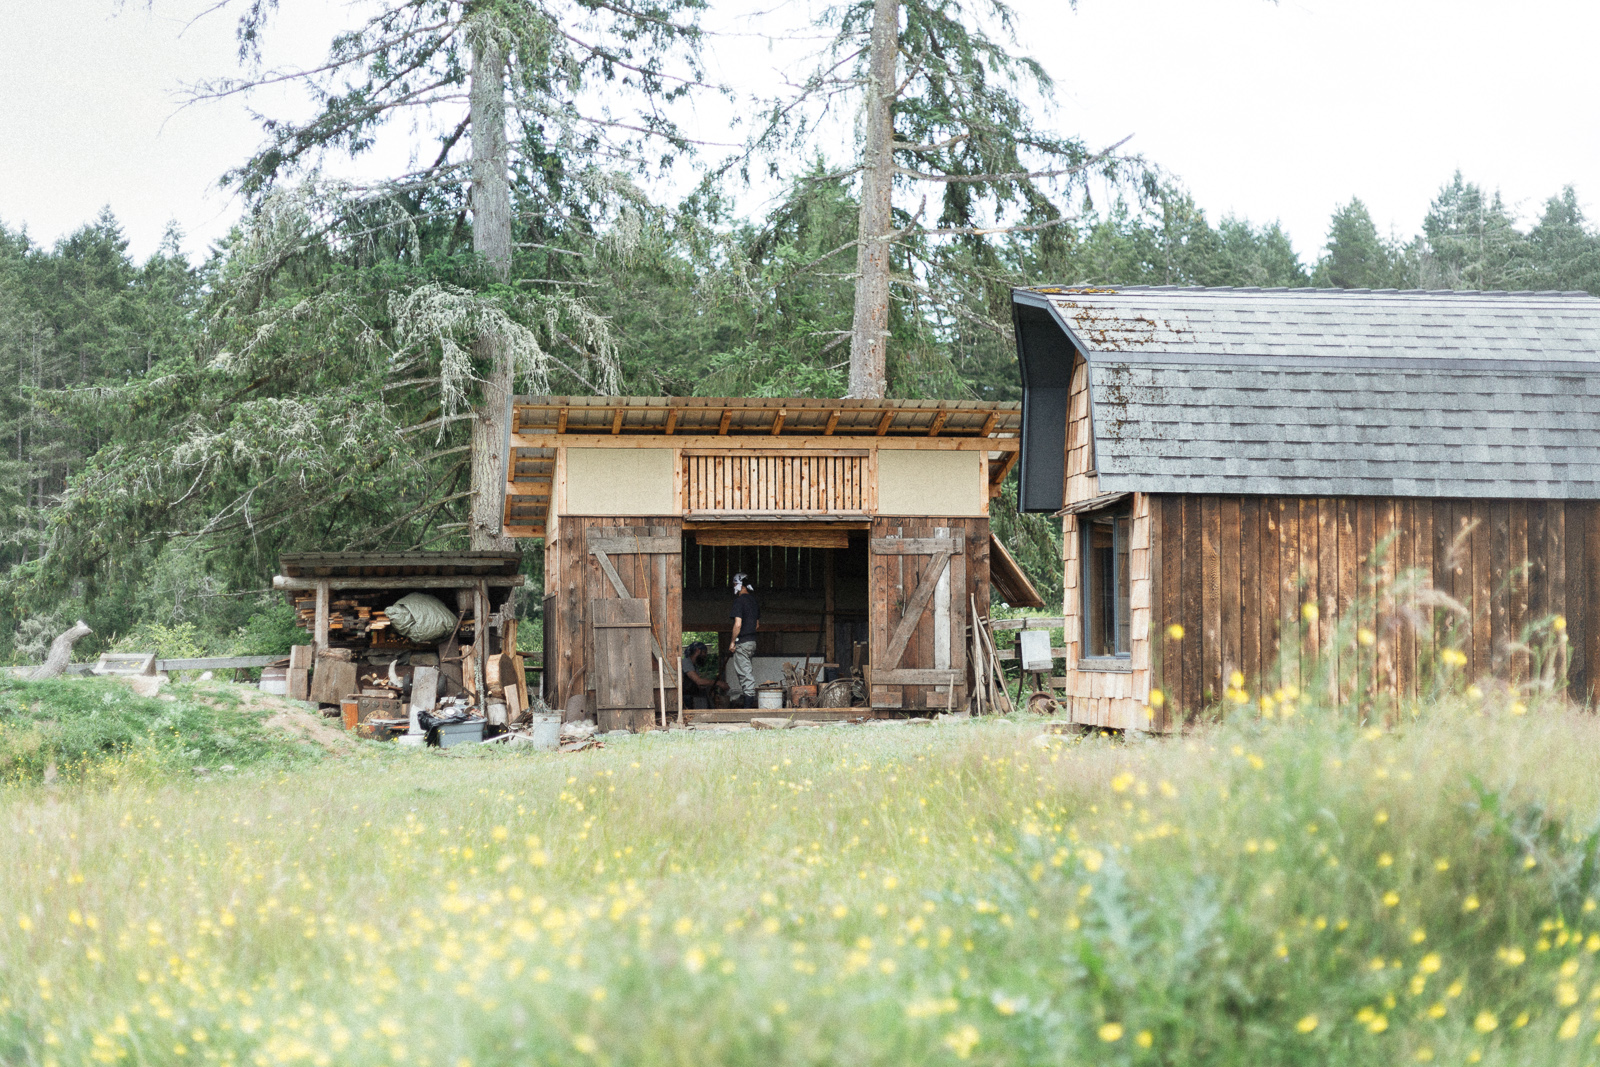
Photo Essay: Forge Visit
Talented Vancouver Island photographer Jordan Wende stopped in at the Island Forge in mid-July to document a visit by Tim of Reforged Ironworks during the time he was helping clean up the forge. In this installment of the series, views of the forge and environs while using the mukozuchi sledge hammers. Photographed and edited by…
-
Photo Essay: Teaching & Instruction
Talented Vancouver Island photographer Jordan Wende stopped in at the Island Forge in mid-July to listen, learn, and document the atmosphere and some of the work going on. In this installment of the series, candid shots of teaching and instruction along with notes on some of the topics covered in this session. Photographed and edited…
-

Repair broken Natural Waterstone with Urushi
Repairing a broken natural Japanese waterstone using urushi lacquer. Natural urushi lacquer is strong enough to repair the stone but will not interfere with sharpening and polishing as some glues may. Carving a cypress base to hold the stone together as well as using urushi lacquer to reattach the halves provides a double solution. The…
-
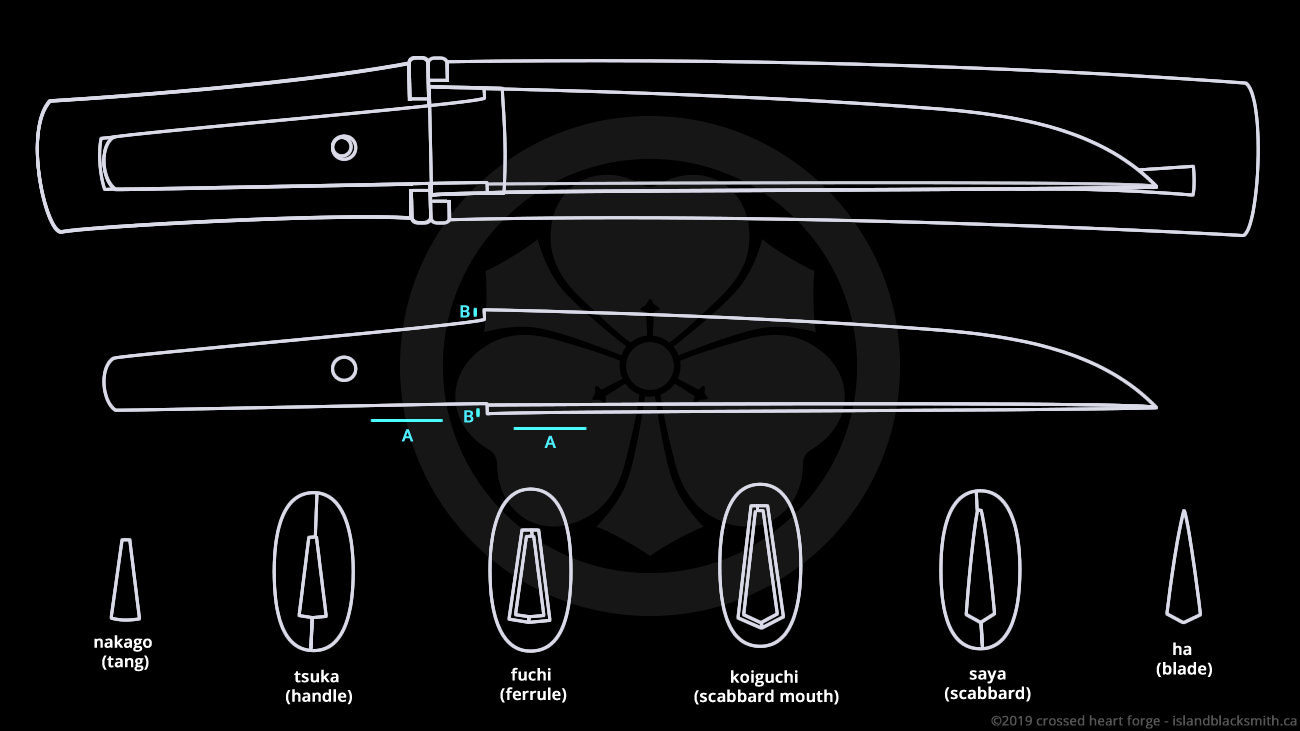
Eyes on the Spine: say No to the kink, and Yes to the flow
One of the most common mistakes when attempting to recreate a Japanese classical style tanto is to caricature or over exaggerate certain design elements while entirely missing others. The Japanese aesthetic is subtle and nuanced, millimeter differences can make or break the lines of a blade or koshirae. A subtle curve is almost always more…
-

Arashiage: Filing Order of Operations
Arashiage is the stage of rough shaping following hizukuri (forging) and in preparation for yaki-ire (hardening). Earlier posts have described tanto kata and the geometry of the tang, machi, blade, and kissaki. Familiarity with these geometry points is a prerequisite to success in this stage. This post will illustrate the proper order of operations for…
-

Bladesmithing at the Museum Forge
Forging a custom forest kotanto in the swordsmith forge. The starting material was a harrow tooth, the finished blade is hirazukuri, mitsu mune, 140mm / 5.5″ nagasa, with a sturdy 6.5mm motokasane. The finish will be tsuchime (hammer texture) so there was no filing or polishing before yaki-ire, which was done at my forge for…
-
Process: Making the Fittings – Aikuchi Tanto Koshirae
The fuchi and koiguchi are from a reclaimed buffalo horn souvenir, the kurikata is from a reclaimed horn button, the wrapping is rawhide samegawa, the mekugi is copper and silver. All of the parts are first shaped and fit, then the samegawa is wet formed to the handle contours, dried, and then attached with sokui…
-
Process: Carving the Tsuka & Saya – Aikuchi Tanto Koshirae
In this video the tsuka is carved first, starting with the fuchi end and then the kashira area, carving the profile outlines and then removing the material in between before carving the final shape and sculpting the details. The saya is next, first dimensioning the blank is to approximate size and then profiling the koiguchi…
-
Process: Carving the Inside – Aikuchi Tanto Koshirae
In this video the tsuka is carved first, starting with the omote side and then the ura, carving each half from the mune to the ha. The saya is next, starting with the omote and then the ura, each half beginning with the fitting of the blade (from the mune towards the ha) and then…
-
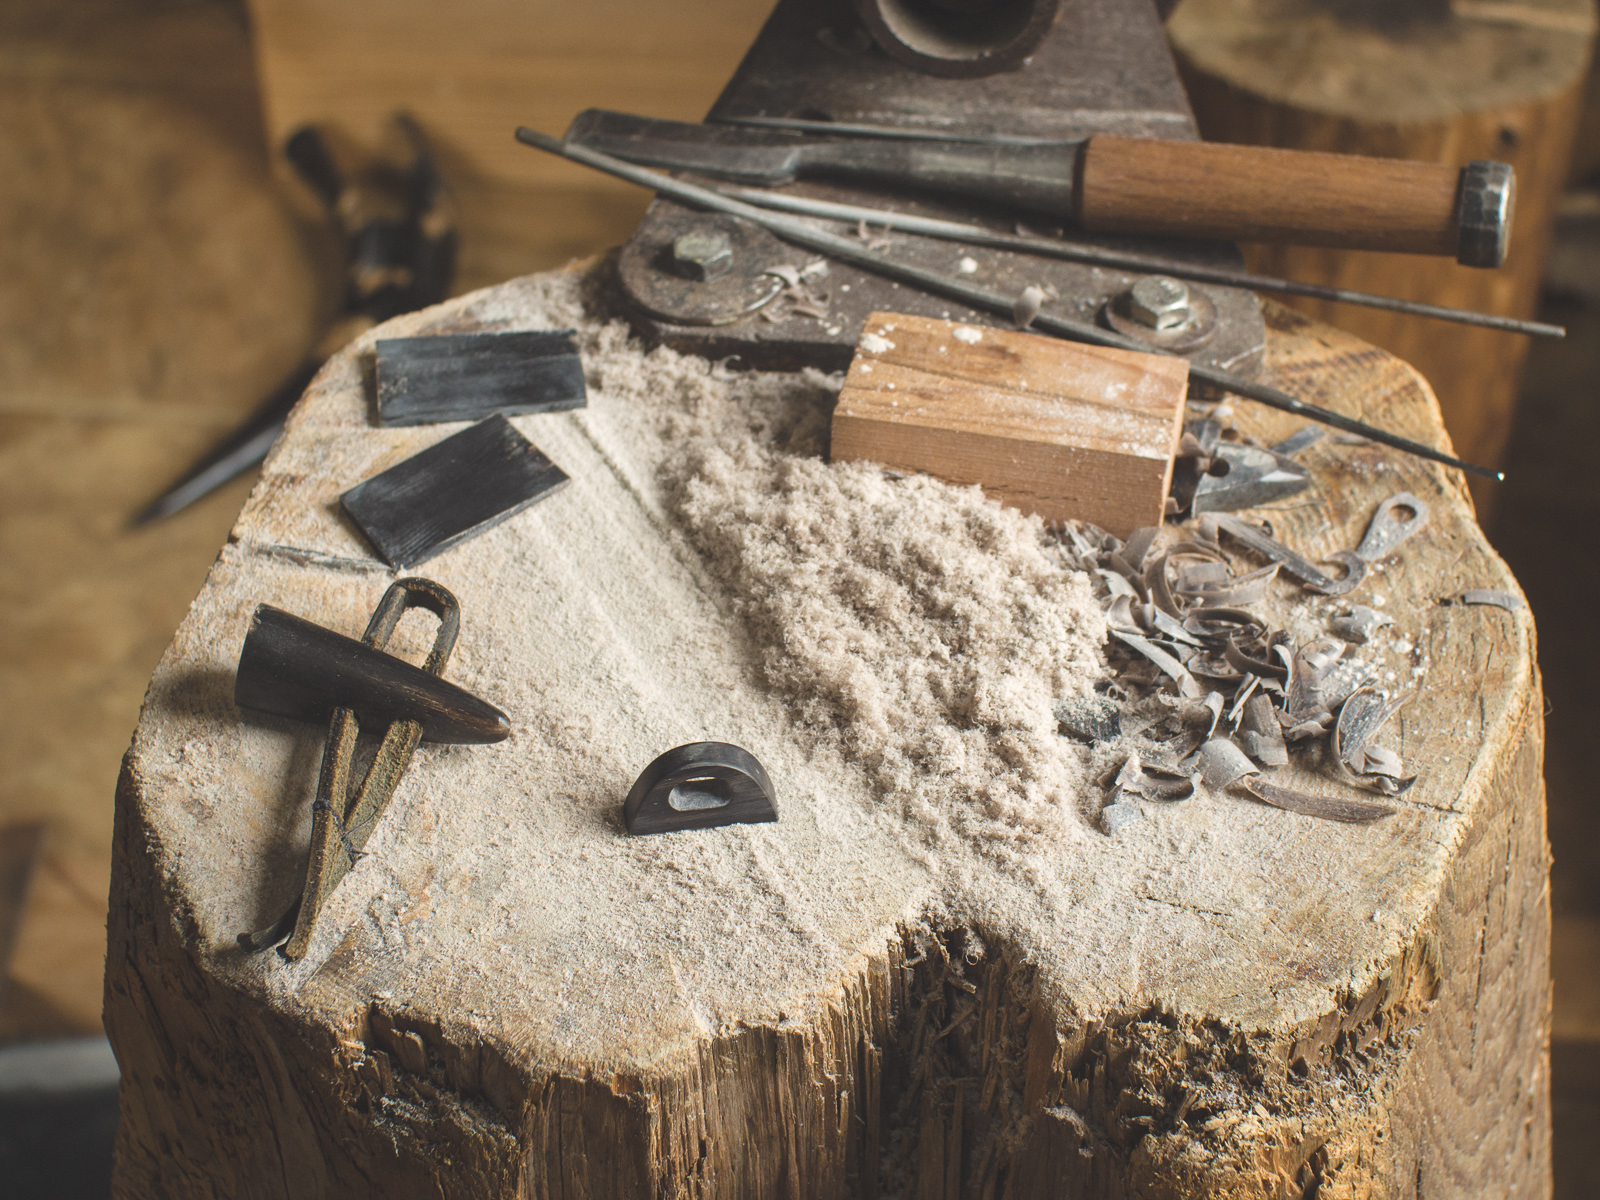
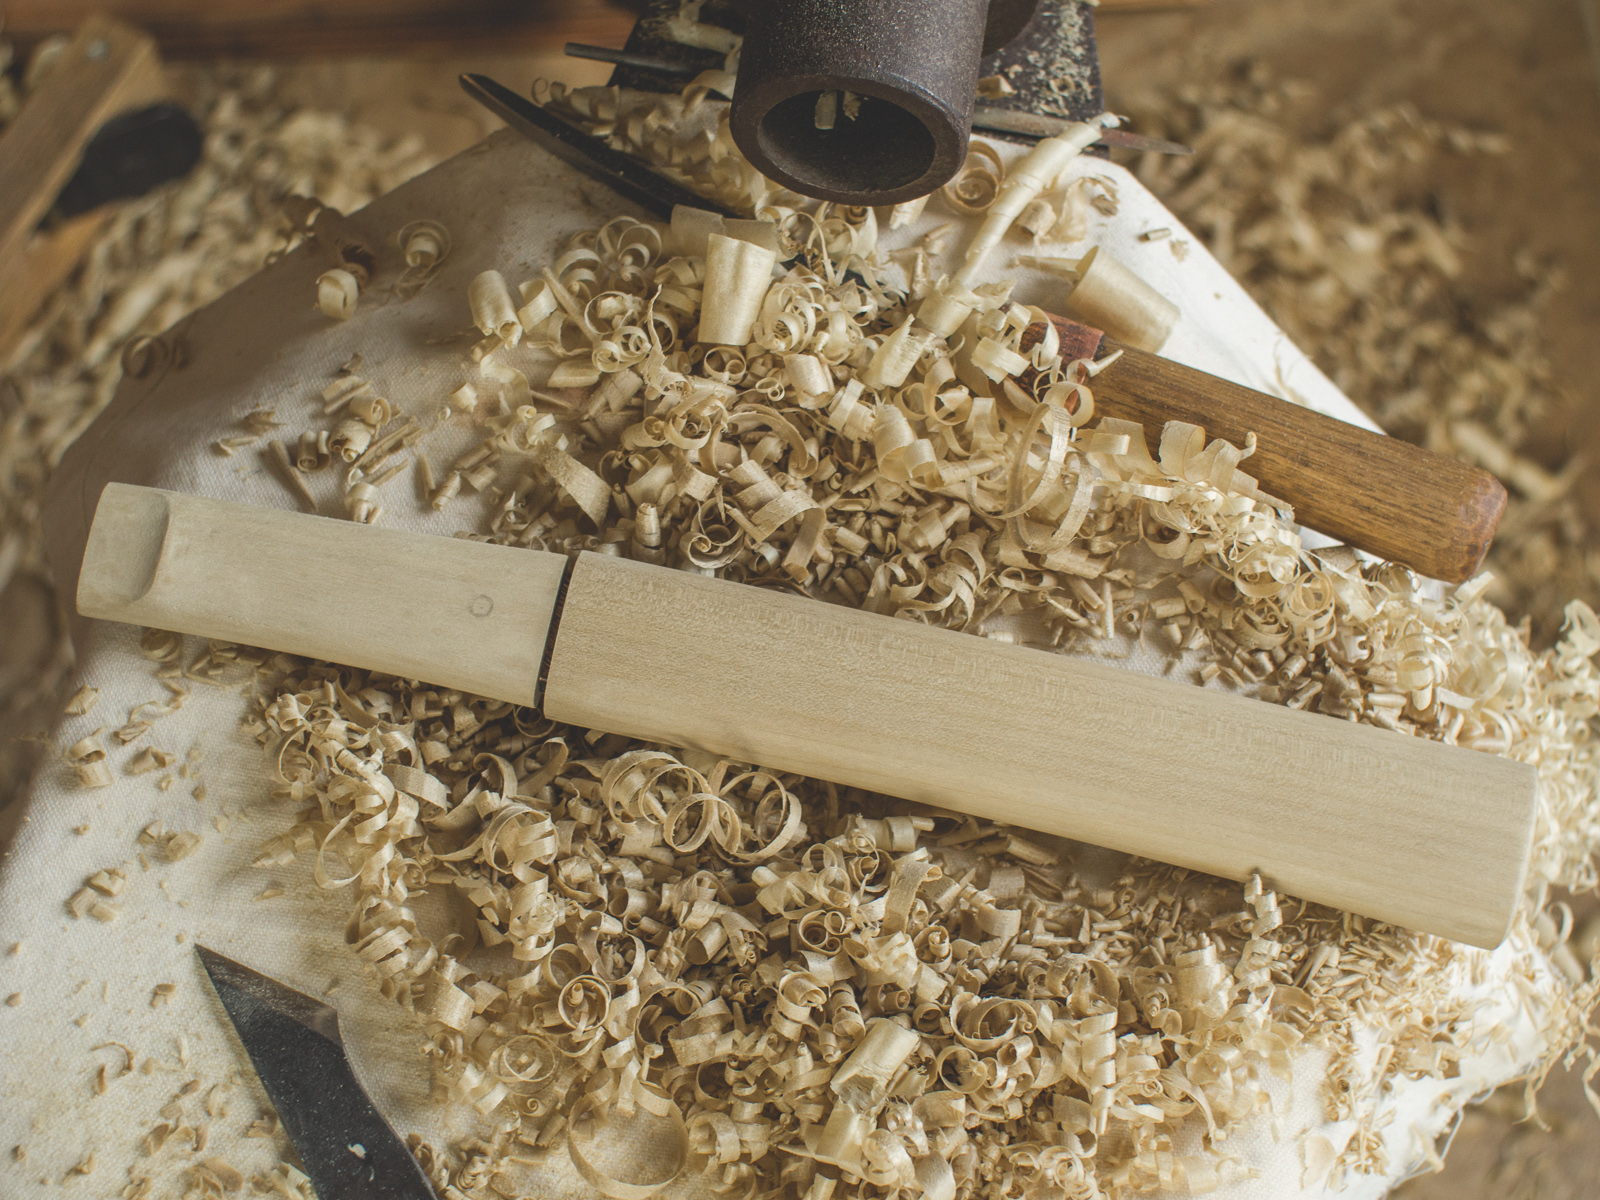
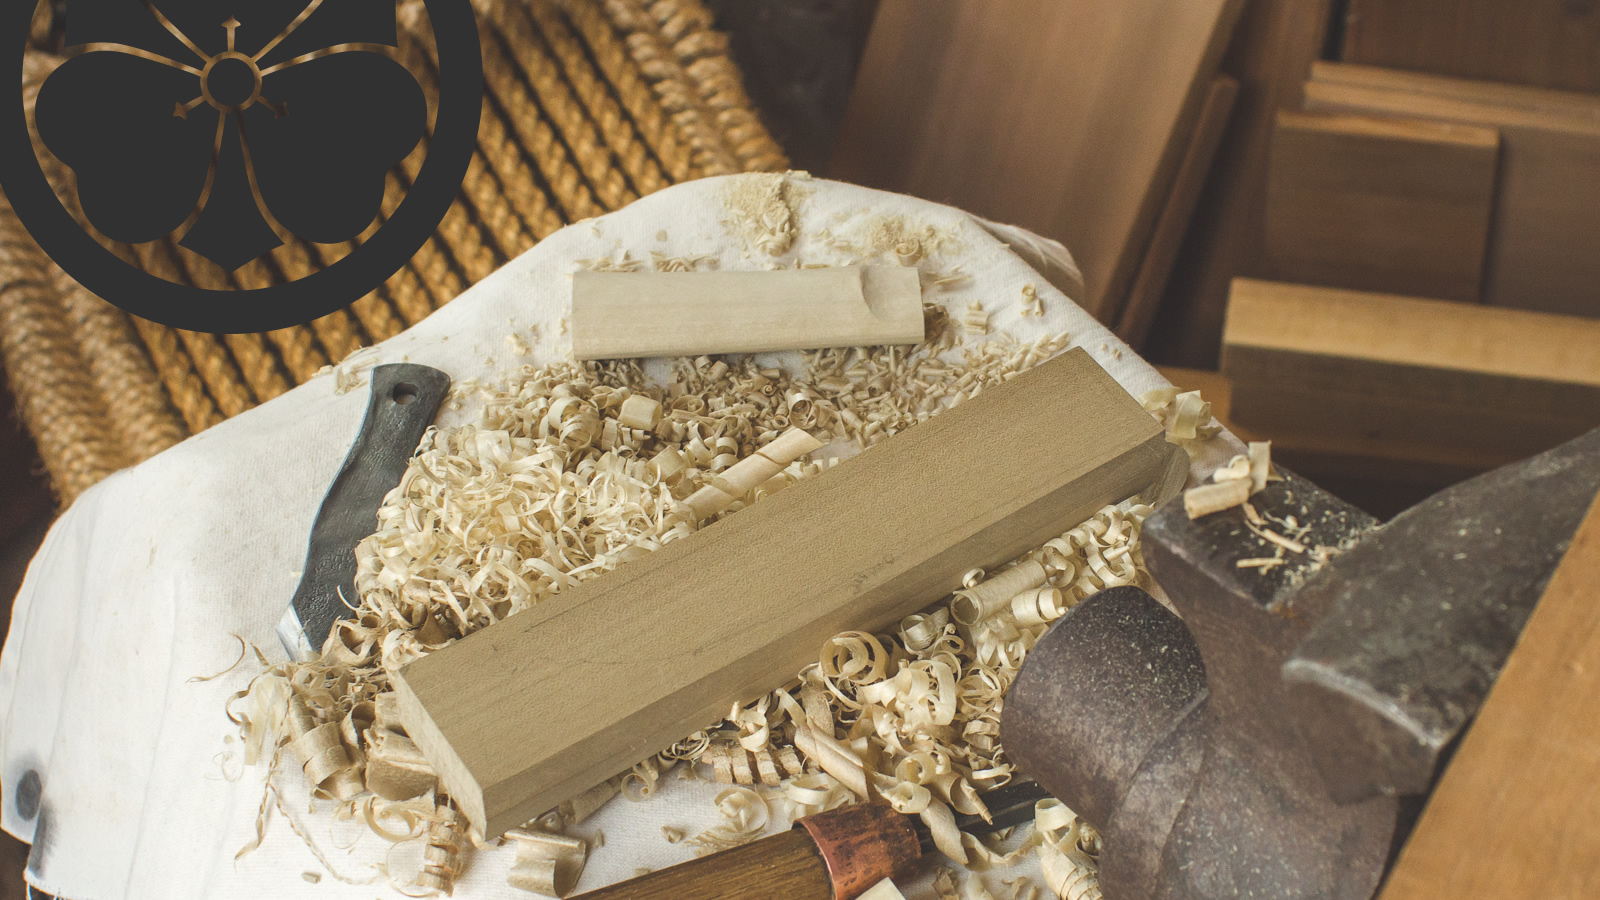
Making a Handle for a Japanese Swordsmithing Hammer
Traditional Japanese swordsmithing hammers have rectangular eyes with no taper. The handles are not wedged but are held in place by a compression fit involving careful shaping, hand forged wood (kigoroshi, 木殺し), and soaking in water. The wood is shaped a mm or two oversized, compressed by hammering, and then driven through the eye. When…
-

Testing Scrap Steel for Knife Making
Most of history was forged with steel that had no designated number or specified ingredient list. Historical smiths would interpret the quality and properties of steel based solely on careful observation and simple testing procedures. To this day, Japanese swordsmiths work exclusively with unnumbered steel made with charcoal and iron sand in traditional smelting furnaces.…
-

Process: Making the Mountain Kotanto
The wider profile of the mountain style kotanto is inspired by a kamakura sword and has a more deeply curved tip (fukura-tsuku) and shorter drop point. The simple and humble mounting style is inspired by the age-old style of farming and foresting tools traditionally used in managing satoyama lands. Satoyama are the managed forest areas…