
Traditional Japanese swordsmithing anvils are simple in form and can be made from readily available materials. This article will present a photographic overview of the process of removing and replacing the swordsmith’s anvil at the museum forge on Vancouver Island.
Most of history was forged with very simple equipment made from found and natural materials. A functional and economical bladesmithing anvil can be made with scrap or structural steel.
The museum anvil was originally installed in 2016 and was made from three separate pieces of metal bolted together. While very heavy and quite functional, a slightly smaller solid anvil would work better for space and event constraints, and the existing anvil can be better used elsewhere for heavy work. For a limited budget, solid structural steel can function quite well as a bladesmithing anvil, in this case locally available 5″ thick 44W plate.
Removing the Existing Anvil
The base of the existing anvil was buried more than 16″ below the floor due to its size, and weighing in at over 500lbs it required some slow and careful work to remove and relocate. It will either be used at the museum as a heavy duty striking anvil or will find a new home in another workshop.


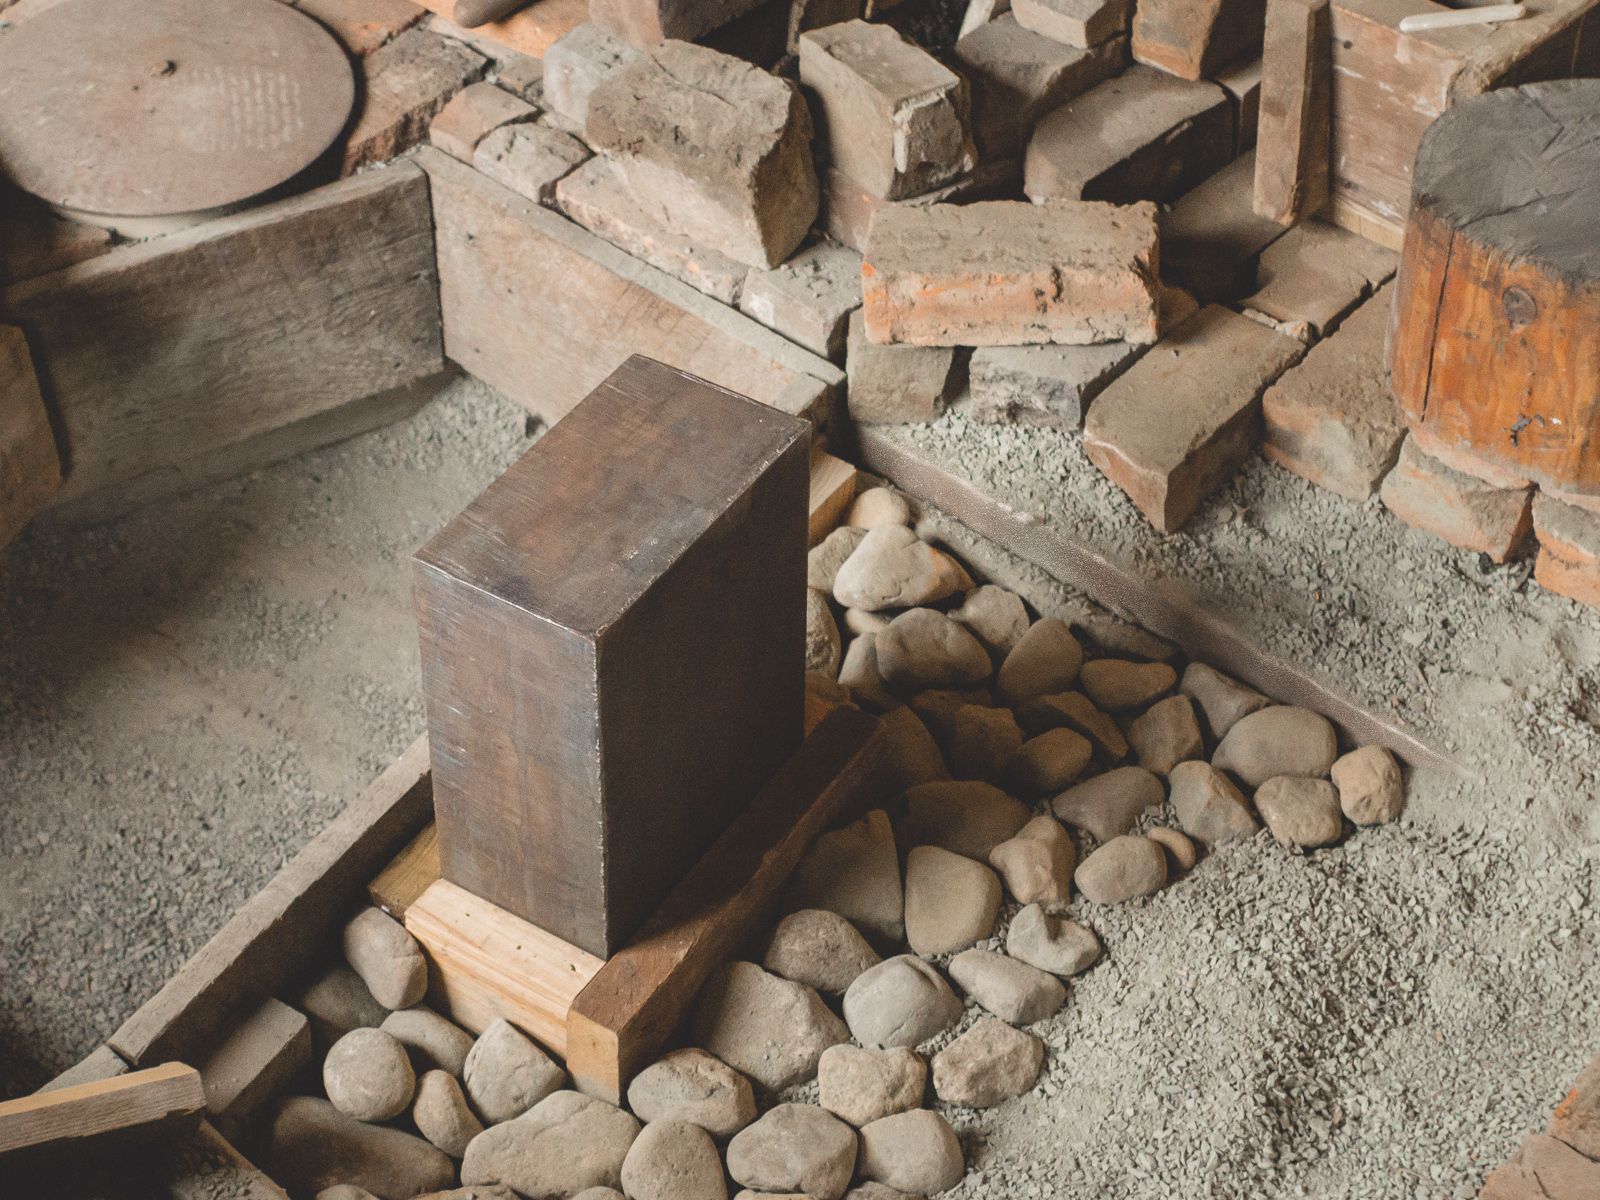
Installing the New Anvil
The new anvil was ordered from a local steel supplier, saw cut from 5″ thick plate. A mid or higher carbon tool steel would be ideal (even if un-hardened) but structural grade 44W will work and is relatively economical. Generally there is a minimum order and a cost for the cutting in addition to the steel price by weight but it will total much lower than a London pattern of the same weight.
The face dimensions should be 4-6″ by 8-10″ (10-14cm x 20-24cm / 3.5-4.5sun x 6.5-8sun) and with height enough to bury securely in the ground. The weight can be calculated to determine the best size, but a recommended minimum might be 4.5″x8″x18″ at around 180lbs/80kg, with a better daily use size of 5″x8″x22″ at around 250lbs/110kg. Because all of the mass is directly below the face, even a smaller swordsmith anvil performs like a 30-40% heavier London pattern.
The face should be placed 7-7.5sun above the floor/seat level. A stump or wooden base, often tightened with wedges, can be used to help stabilize the base, and the final step is to flatten and smooth the face and dress the edges with a slight radius.


