Nagatsuki (長月, pronounced “nah-gah-tsoo-key”) translates literally as “long moon”. In the ancient calendar it is a poetic name for the time around late September, possibly abbreviated from yonagatsuki meaning “night of the long moon”, or “month of the long night” depending on the reading. The idea is associated with the time of Autumn, seasonal change after the hot summer begins to cool down, and the activity of moon watching at that time of year. There is an additional play on words as this knife is long in measure, was long in coming, and may be a milestone marker of a coming change of seasons.
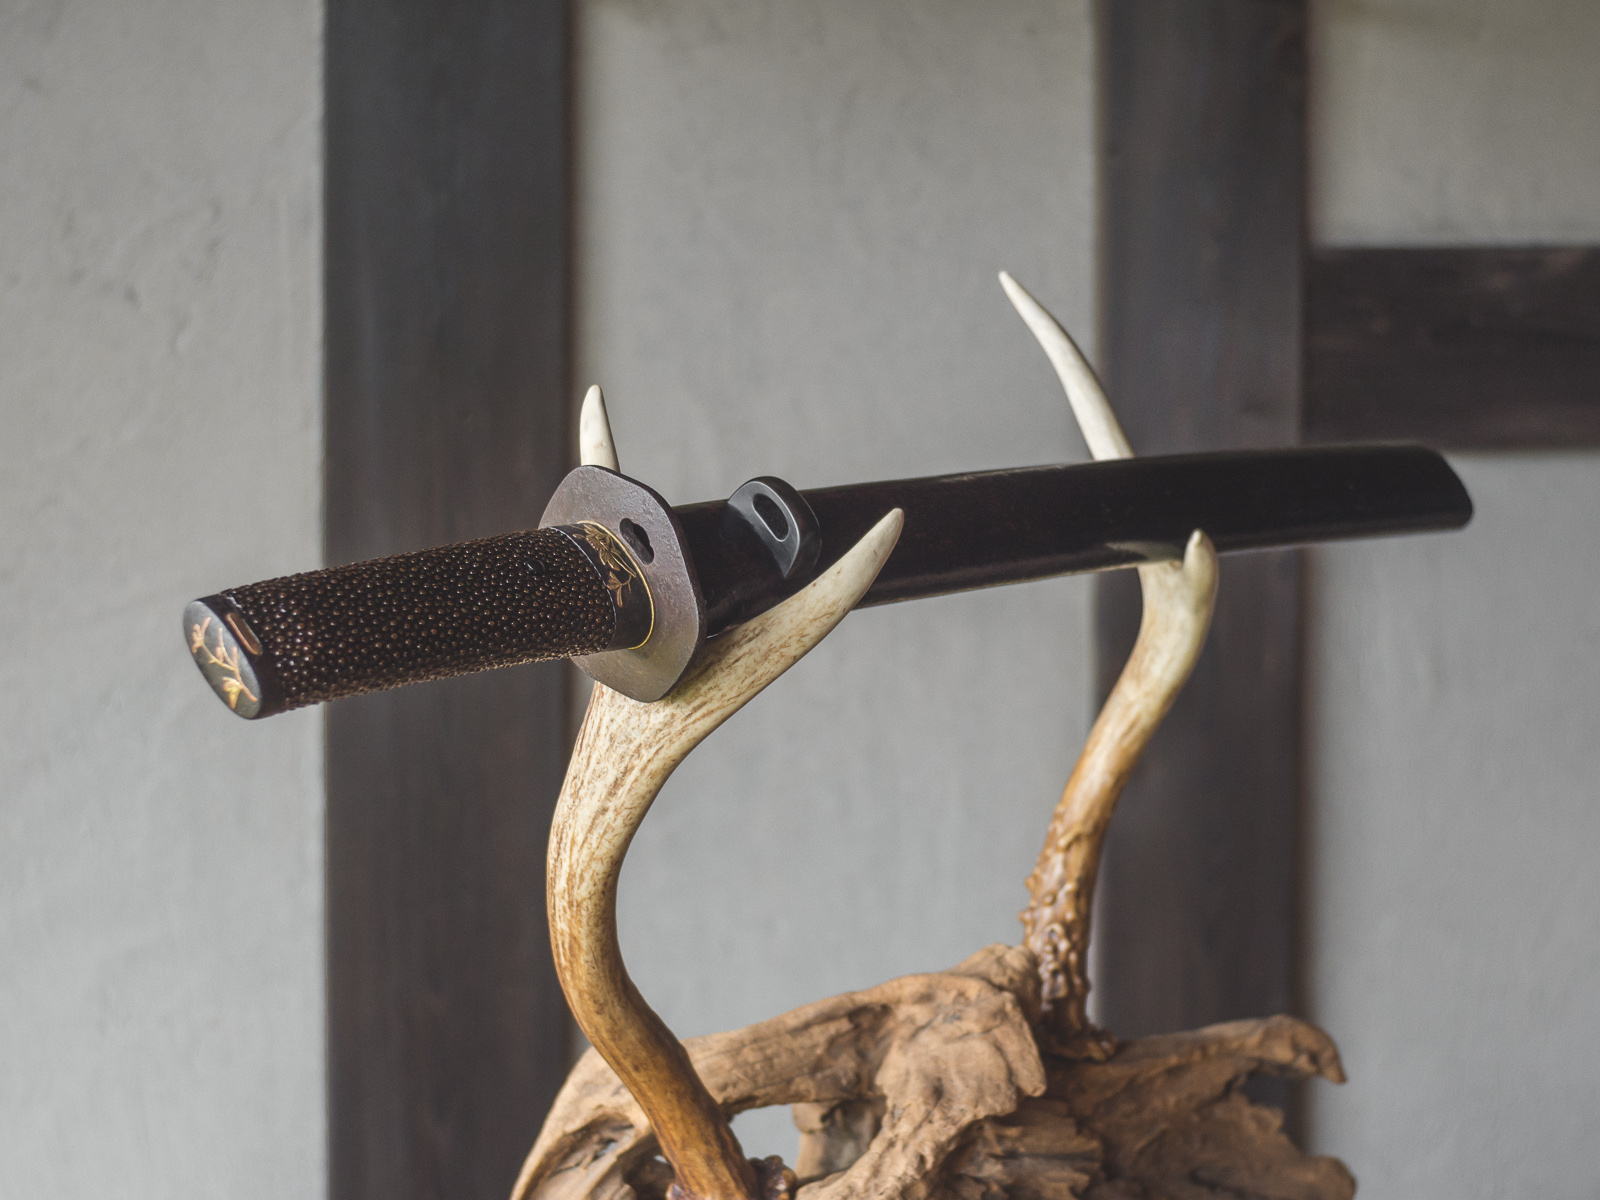
This tanto was forged from an antique horse-drawn carriage spring in 2017, is mounted in a tasteful old style koshirae inspired by a visit to Japan in 2018, and incorporates an antique sword tsuba and matching fuchigashira fittings.
The blade began as a reclaimed carriage spring and was hand forged in a charcoal fire, smoothed with files and a sen scraper, differentially hardened using traditional water quench yaki-ire, and polished by hand with natural Japanese water stones.
This tanto consists of nine separate components that began as twenty individual pieces, crafted and finished with hand tools and traditional techniques.
Materials for the chisagatana style koshirae mounting include Magnolia wood for the handle and scabbard, copper bus bar for the habaki, reclaimed brass doorplate for the seppa, lacquered samegawa for the handle wrap, and carved buffalo horn for the koiguchi, kurikata, and mekugi. The centerpiece of the mounting is an antique Edo fuchi and kashira pair made from iron, inlaid with copper, and accented with gold. The iron tsuba is also antique, Edo or earlier, from Japan. The saya is finished in rustic textured red and black negoro crafted from natural source urushi lacquer and sawdust made by carpenter ants.
Blade has a hira-zukuri profile, suguha hamon with artifact on the omote, an iori mune, and an ubuha (unsharpened portion near the hamachi). The blade is about 11.25″ long, overall length is around 16.5″, and the overall length of the koshirae is just over 18.25″. Accompanied by a vintage Japanese storage bag.
Specifications
長さ/刃長 Nagasa: 9 sun 4 bu 5 rin (287mm)
元幅 Motohaba: 7 bu 5 rin (22mm)
重ね/元重 Motokasane: 2 bu (6mm)
反り Sori: uchizori
中心/茎 Nakago: 3 sun 2 bu 7 rin (100mm)
柄長 Tsuka: 3 sun 7 bu 7 rin (114mm)
拵全長 Koshirae: 15 sun 3 bu 5 rin (465mm)
形 Katachi: hira-zukuri, iori-mune
刃文 Hamon: suguha, with ubuha
帽子/鋩子 Boshi: ko-maru
中心/茎 Nakago: futsu, kuri-jiri, one mekugi-ana, signed near the tip
銘 Mei: hot stamped katabami-ken kamon
拵 Koshirae: chisagatana, issaku (with the addition of three antique parts)
Material: Reclaimed carriage spring steel, Edo-period iron fuchigashira with copper inlay and gold accents, Edo-period iron tsuba, copper bus bar, brass doorplate, buffalo horn, Magnolia, samegawa, natural urushi, and carpenter ant sawdust
This piece is in a private collection on Vancouver Island.
The raw material for this blade spent the last century as a leaf spring for a horse-drawn carriage.
The carriage springs being removed from the pivot assembly with a cold chisel.
Final forging for this piece was done at the museum forge, more about building this traditional forge.
Forged bevels, note the reverse curve anticipating the effects of the clay hardening process.
Checking the hamon placement with a coarse waterstone after yaki-ire.
Making the Habaki
Habaki forged to shape, fire soldered, fit and cold hardened by hammering, and finished using hand files.
The final shape is hand filed and a decorative groove is added.
The habaki design is closely based on the study of an antique.
Carving the Tsuka & Saya
Planing the Magnolia wood blank smooth after sawing in half lengthwise.
The halves of the tsuka are carved to fit the tang, the offset along the edge minimizes stress on the glue joint.
The halves of the saya carved and ready for gluing with sokui (rice paste glue).
Carving the rough handle block to fit an antique fuchi (ferrule) before shaping the rest of the tsuka.
Approaching the final shape of the tsuka and saya after carving and planing the exterior surfaces.
Making & Preparing the Fittings
Seppa are cut and chiseled from a reclaimed doorplate, filed to fit the tang, and hammered flat.
Carefully hammering copper sekigane (責金) into an antique tsuba to fit and protect the tang.
The rough shapes for the scabbard fittings are sawed from water buffalo horn.
Using a sawfile to sculpt the rough shape of the kurikata (cord loop).
Kurikata and koiguchi finished with fine files and polished with fine sandpaper before fukiurushi lacquering.
Carving the saya with a tenon shoulder and sliding dovetail to receive the fittings.
Washi paper is used to reinforce the seams along the joint of the saya.
Using scrap copper wire to fabricate the small inserts for the kashira.
Using an antler tip to polish away the loose rust but leave the patina from the centuries.
Using a special clay blend to repair the patina in the scratched or damaged areas.
After boiling in tea to convert remaining red iron oxide to stable black iron oxide, the surface is polished with a soft cotton cloth and the patina is restored evenly to its proper antique colour and condition.
Preparing the Samegawa
Samegawa (rawhide rayskin) is cut to match a washi paper template based on the tsuka surface.
After wet forming to the handle, ready for gluing with sokui (rice paste glue).
The tang is drilled and the tsuka is marked for the mekugi-ana (peg hole).
The holes are carefully aligned and placed with functional and aesthetic considerations.
The samegawa is glued in place and the mekugi-ana cut through in preparation for lacquering.
Lacquering the Tsuka & Saya
The samegawa is sealed with thin layers of natural urushi made from the sap of a certain tree.
The first layer of natural fukiurushi seals the wood and prepares the surface for the following layers.
A second layer is used to adhere natural sawdust made by carpenter ants to the surface of the saya.
Two shades of crimson lake blended lacquer are used to saturate and seal the wood dust, creating a texture of small peaks and valleys.
Multiple layers of black lacquer are used to fill in the valleys, each requiring several days to cure.
The peaks are filed off and then the surface is polished with charcoal and water, revealing the crimson texture. Final layers of very thin natural urushi are then wiped on to seal and darken the surface.
The horn fittings are permanently installed into the saya.
Polishing the Blade
Once all the parts are made and fitted the blade can be taken through the final polishing stages using Japanese waterstones.
Each successive stone is finer and progressively refines the geometry of the blade and smooths the surface.
Several fine natural stones make up the last steps, right down to small fingertip-sized stone flakes with washi paper lacquered to the back for strength.
Omote (public/display side) with angled natural window light.
Ura (back/private side) with angled natural window light.